
The Water Stain That Started Small
Maria noticed a faint yellowish mark on her bedroom ceiling in her Van Nuys Civic Center home one Tuesday morning. By the following week, the stain had doubled in size, and by month’s end, she was catching drips in a bucket during a storm. The leak’s actual entry point? Fifteen feet away at a deteriorated pipe boot on the opposite side of her roof. Water had traveled along a ceiling joist before emerging at the lowest point—a common pattern in Van Nuys homes built during the 1950s through 1970s construction boom. This scenario plays out in thousands of local properties each year, where hidden roof leaks silently cause damage long before homeowners realize there’s a problem.
📋 In This Guide
Hidden roof leaks represent one of the most financially destructive maintenance issues facing Van Nuys homeowners. Unlike obvious leaks that announce themselves with visible drips, concealed water intrusion operates silently—rotting structural framing, saturating insulation, breeding mold colonies in wall cavities, and multiplying repair costs from hundreds to tens of thousands of dollars. In neighborhoods like Lake Balboa Adjacent and Sherman Way Corridor, where the median home value reaches $700,000 and 72% of properties are rental investments, early leak detection protects substantial financial assets. This diagnostic guide provides actionable steps to locate leak sources before calling for roofing services in Van Nuys, potentially saving thousands in emergency repair costs.
Step 1: Conduct an Interior Ceiling and Wall Investigation
Begin your leak detection inside the home during daylight hours. Walk through every room with a bright flashlight, systematically scanning ceilings and upper wall sections for moisture evidence. Look for discoloration patches ranging from light yellow to dark brown—these tannin stains indicate where water has leached through building materials. Pay particular attention to corners where walls meet ceilings, as water naturally migrates to these junctions.
Check all lighting fixtures and ceiling-mounted fans closely. Electrical box penetrations create pathways where moisture appears first, often showing water rings around the fixture base before ceiling stains become visible. In textured ceilings common throughout Van Nuys construction, subtle moisture evidence disappears into the texture pattern until saturation reaches critical levels, so examine suspicious areas from multiple angles under direct light.
Document every finding with smartphone photos that include date stamps. Measure the stain’s dimensions and note its distance from walls and identifiable features. This documentation proves essential for insurance claims and helps professional roof repair services in Van Nuys understand the leak’s progression timeline.
Understanding Water Travel Patterns
The ceiling stain you observe rarely sits directly beneath the roof’s actual leak point. Water enters through a compromised area on the roof surface, then travels along rafters, ceiling joists, or electrical conduits before gravity pulls it through insulation at the lowest available point. A hallway stain might originate from deteriorated roof flashing in Van Nuys homes fifteen feet away at a wall junction or chimney penetration.
Brown or rust-colored staining indicates older, recurring leaks where water has been present long enough to oxidize metal fasteners and leach tannins from wood framing. Fresh water stains appear lighter—sometimes just darker than the surrounding ceiling—and may feel damp or cool to touch. Active leaks during rain events allow you to trace the water path in real-time by following moisture trails in the attic.
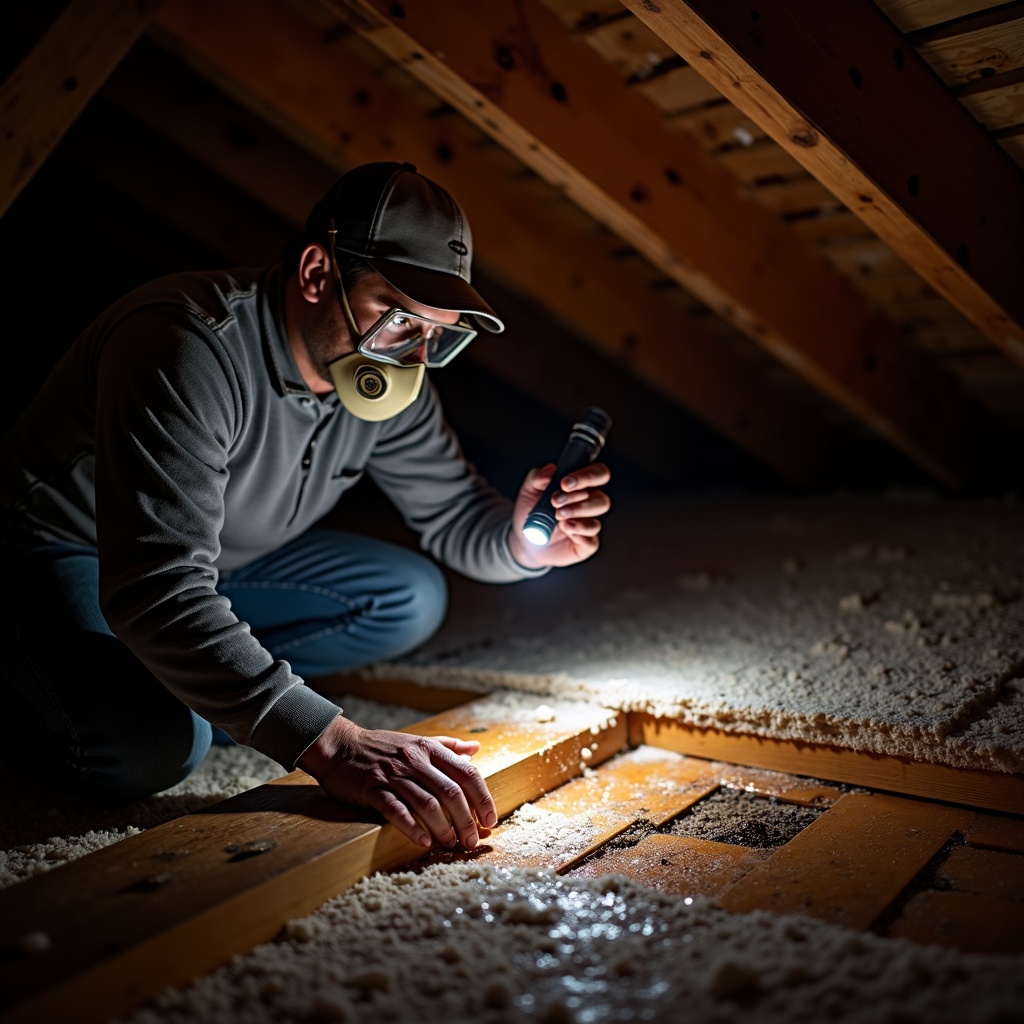
Step 2: Inspect Your Attic Space During and After Rain
Attic investigation provides the most direct evidence of roof leak entry points. Time your inspection for during or immediately after rainfall when active leaks remain visible. Bring a powerful flashlight or headlamp, wear protective clothing including a dust mask, and move carefully across ceiling joists—never step on insulation or drywall between joists.
Start at areas directly above interior water stains, then expand your search systematically across the entire attic. Look for these specific moisture indicators:
- Active water drips or streams running down rafters or pooling on insulation
- Dark discoloration on roof decking or rafters indicating chronic moisture exposure
- Watermarks showing previous leak paths that may reactivate during heavy rain
- Compressed or matted insulation where water saturation has collapsed the material
- Daylight penetration through roof decking indicating holes or severely deteriorated sections
- Black or green growth on wood surfaces signaling mold or mildew from persistent moisture
Trace any active water flow upward along rafters to its highest point—that’s typically closest to the roof’s actual entry location. Van Nuys homes with composition shingle roofs often show leaks originating at roof penetrations like plumbing vents, exhaust fans, or satellite dish mounting points where sealants have failed under the San Fernando Valley’s intense summer heat.
Recognizing Chronic Moisture Damage
Not all roof leaks announce themselves with obvious drips. Chronic low-grade moisture intrusion appears as wood darkening, insulation deterioration, and musty odors. Run your hand along rafters near suspected leak areas—if the wood feels damp, spongy, or shows surface fibers separating from the main beam, moisture damage has progressed to structural concerns requiring immediate professional assessment.
Insulation acts like a sponge, absorbing and holding water that creates ideal mold growth conditions. Fiberglass insulation changes color from pink or yellow to gray or black when saturated. Cellulose insulation compresses and develops dark staining. Any insulation showing these signs must be removed and replaced after leak repairs, as saturated insulation loses 90% of its thermal resistance and harbors persistent moisture even after the leak source is fixed.
Step 3: Identify Common Leak Entry Points in Van Nuys Architecture
Certain roof features consistently fail and create leak pathways in Southern California’s climate. Understanding these vulnerable points helps you focus detection efforts on the highest-probability areas.
| Leak Source | Common Failure Mode | Detection Signs |
|---|---|---|
| Pipe boots | Rubber gasket cracks from UV exposure | Water stains around bathroom/kitchen vents |
| Step flashing | Separation from walls, corrosion | Moisture where roof meets vertical walls |
| Valley seals | Debris accumulation, sealant deterioration | Leaks near roof plane intersections |
| Skylight perimeter | Flashing seal breakdown, frame separation | Water drips around skylight frame |
| Chimney flashings | Counter-flashing pulls away from masonry | Stains on walls adjacent to chimney |
Pipe Boot Failures
Plumbing vent pipes penetrate roofs at multiple points, each sealed with a pipe boot—a rubber or neoprene gasket that wraps the pipe base. Van Nuys experiences summer roof surface temperatures exceeding 160°F, which accelerates rubber deterioration. After 7-10 years, these gaskets crack and separate from pipes, creating direct water entry channels. From the attic, you’ll see water running down the pipe during rain. From the roof surface, cracked boots show visible gaps between the rubber collar and pipe.
Step Flashing Deterioration
Where roof planes meet vertical walls—common in homes with attached structures or multi-level designs—step flashing provides the waterproof transition. This L-shaped metal flashing weaves between shingle courses and up the wall surface. When sealants fail or flashing corrodes, water infiltrates behind the wall and travels downward inside the structure. A competent roof contractor in Van Nuys checks these junctions carefully, as step flashing leaks often present as interior wall moisture several feet below the actual roof line.
Valley Seal Breakdown
Roof valleys—where two roof planes intersect at an angle—channel tremendous water volumes during Van Nuys’ concentrated winter rainfall between November and March. Valley flashing must handle this hydraulic pressure while resisting debris accumulation. Failed valley seals create leaks that appear anywhere along the valley’s downward path. Inspect valleys from the roof surface for debris dams, lifted shingles, or visible gaps in the valley metal.
Step 4: Document Findings for Insurance and Professional Assessment
Thorough documentation transforms your leak investigation from casual observation into actionable intelligence for insurance adjusters and repair contractors. Create a systematic record using these methods:
Photographic evidence: Capture wide shots showing the leak’s location relative to room features, then close-ups of the damage itself. Include a ruler or common object for scale. Photograph the same areas weekly to document progression. In the attic, photograph both the ceiling damage from below and the roof decking damage from above, clearly showing the water’s entry point and travel path.
Written log: Maintain a dated record noting when you first observed the leak, weather conditions during each observation, and how the damage has changed over time. Insurance claims often require this timeline to establish whether damage occurred during the policy period.
Measurements: Record stain dimensions, distance from walls and corners, and affected square footage. For attic observations, measure from the leak’s roof entry point to recognizable features like vents or chimneys, which helps contractors locate the problem area from the exterior.
When Infrared Moisture Scanning Becomes Necessary
Some leaks hide so effectively that standard visual inspection cannot locate them. Infrared moisture scanning uses thermal imaging to detect hidden moisture, with professional services typically costing $400-$600. This technology identifies temperature differentials where trapped moisture affects insulation values, revealing leak patterns invisible to visual inspection.
Consider professional infrared scanning when you observe interior water damage but cannot locate the entry point through standard attic inspection, when multiple leak areas suggest systemic roof failure, after you’ve completed repairs but want confirmation that no residual moisture remains trapped in building assemblies, or before purchasing a Van Nuys property to verify roof condition beyond surface appearances.
Infrared scans work best on flat or low-slope roofs common in commercial buildings and some residential applications throughout the Panorama City and Van Nuys areas. The technology detects moisture trapped beneath roofing membranes—conditions completely invisible during standard roof inspections. For homeowners managing rental properties, thermal scanning provides definitive evidence of concealed damage that protects against tenant liability claims.
Step 5: Implement Temporary Containment While Arranging Repairs
After identifying a leak’s location, immediate containment prevents damage escalation while you arrange professional repairs. These temporary measures never substitute for proper roof repair but protect your property during the days or weeks before contractors can complete permanent fixes.
Interior containment: Position buckets or waterproof containers under active drips. If water pools on a ceiling, creating a bulge, puncture the lowest point with a small nail to create a controlled drainage point into a bucket—this prevents ceiling collapse from water weight. Move furniture, electronics, and valuables away from affected areas. Run fans to promote air circulation and prevent mold establishment, but never point fans directly at saturated surfaces, which drives moisture deeper into materials.
Exterior temporary sealing: For accessible leak points like cracked pipe boots or obvious flashing gaps, applying roofing cement or sealant provides short-term protection. Clean the area thoroughly, ensure it’s completely dry, then apply sealant generously over the compromised section. This temporary fix typically lasts through one or two storm cycles but deteriorates rapidly under UV exposure.
Emergency tarping: When leak sources affect large roof areas or professional repairs cannot occur immediately, install a waterproof tarp over the damaged section. Extend the tarp at least 4 feet beyond the leak area on all sides. Secure it with lumber or sandbags—never drive fasteners through roofing materials, which creates additional penetration points.
Van Nuys homeowners should understand that temporary measures provide emergency protection only. California’s concentrated winter rainfall and summer heat cycles degrade temporary repairs quickly. Professional assessment and permanent repair through a licensed contractor remain essential. Contact Roof Repair & Construction Inc. at (323) 474-1088 for emergency leak diagnosis and permanent repair solutions. Our technicians respond quickly to Van Nuys properties, providing comprehensive leak detection, insurance documentation support, and complete roof leak repairs that address both the symptom and the underlying cause.
Understanding When DIY Detection Isn’t Enough
While these diagnostic steps help most homeowners identify obvious leak sources, certain situations require professional expertise from the start. Complex roof geometries with multiple intersecting planes, skylights, and dormers create leak pathways that require specialized knowledge to trace. Steep-pitch roofs where safe access demands proper equipment and training should never be investigated by homeowners. Signs of structural damage like sagging roof sections, separated rafters, or extensive rot indicate problems beyond simple leak repair—these require immediate engineering assessment.
Professional roof inspection services from Roof Repair & Construction Inc. combine visual assessment, moisture meters, and when appropriate, infrared scanning to locate leak sources definitively. Our technicians understand how water behaves in Van Nuys’ specific climate conditions, which roof penetrations fail most frequently in local architecture, and how to distinguish between active leaks requiring immediate repair and old damage from previously resolved issues. This expertise prevents the costly cycle of addressing symptoms while missing the actual problem—a pattern that leads homeowners to spend thousands on repeated repairs that never solve the underlying leak.
Budget-conscious Van Nuys residents, where the median household income of $62,000 demands careful spending decisions, benefit from professional diagnosis that identifies the minimum necessary repair scope. A skilled contractor distinguishes between situations requiring full roof replacement and those manageable with targeted repairs, providing transparent cost estimates that help property owners make informed decisions. For the 72% of Van Nuys properties that serve as rental investments, professional leak detection and documentation creates clear records for insurance claims, capital improvement planning, and tenant communications.
Frequently Asked Questions
How can I tell if a ceiling stain is from an active roof leak or old water damage?
Active leaks show moisture when touched, feel cool compared to surrounding areas, and expand in size after rain events. Old water damage appears as fixed discoloration that doesn't change, feels completely dry, and often shows sharp edges where the stain stopped spreading. Professional moisture meters used by Roof Repair & Construction Inc. at (323) 474-1088 provide definitive readings.
Why does my Van Nuys home leak in one room when the roof damage is somewhere else?
Water travels along rafters, ceiling joists, and electrical conduits after entering through roof penetrations, emerging at the lowest available point which may be 10-20 feet from the actual leak source. This directional flow pattern is especially common in homes built during Van Nuys' 1950s-1970s construction boom where roof framing creates natural water channels.
What is infrared roof moisture scanning and when should Van Nuys homeowners use it?
Infrared scanning uses thermal imaging cameras to detect temperature differences caused by trapped moisture beneath roofing materials, revealing hidden leaks invisible to visual inspection. It costs $400-$600 and proves essential when you see interior damage but cannot locate the entry point, after repairs to confirm moisture elimination, or when purchasing property to verify actual roof condition.
Can I safely inspect my own roof for leaks or should I hire a professional?
Homeowners can safely conduct interior ceiling checks and attic inspections if comfortable working in confined spaces, but roof surface inspection requires proper safety equipment, fall protection, and knowledge of how to walk on roofing materials without causing damage. Professional contractors like Roof Repair & Construction Inc. carry liability insurance and specialized equipment that makes roof access both safer and more thorough.